A clear, practical tutorial for anyone who wants to design durable, personalized outdoor pillows quickly—without prior design experience.
Introduction
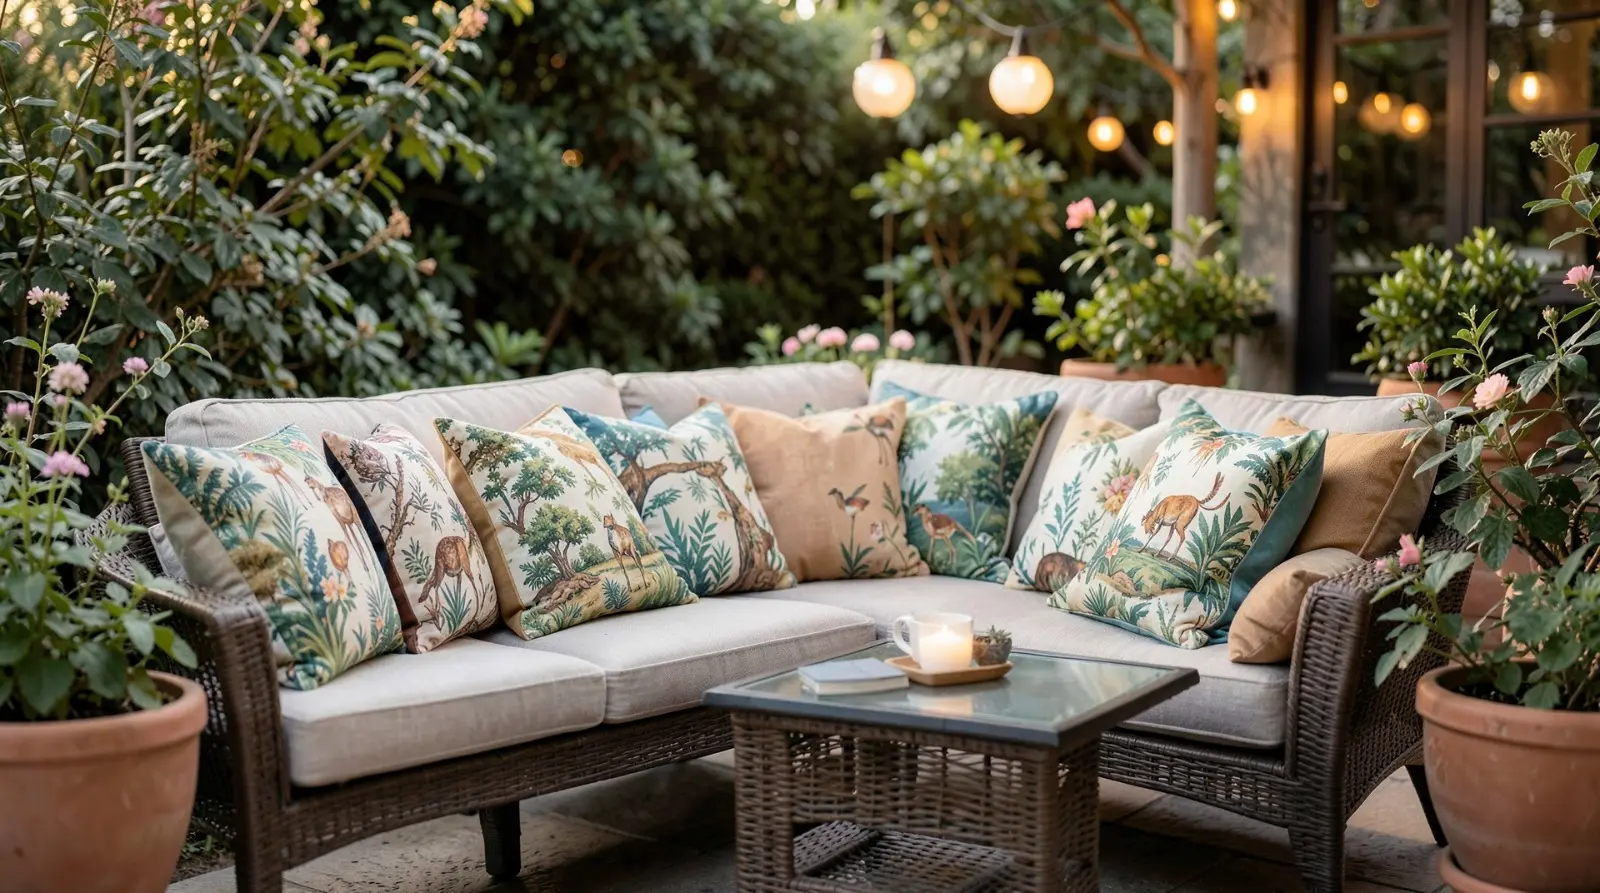
Outdoor living spaces have become extensions of the home. A well-chosen housewarming gift for a patio, balcony, or backyard needs to be both functional and personal. Custom outdoor pillows meet that need by combining everyday utility with meaningful personalization—names, dates, coordinates, or subtle inside references.
Many people assume custom décor requires advanced design skills or complex software. In practice, most Custom Outdoor Pillow Design platforms are built around templates, guided layouts, and print-ready previews. The main challenge is not artistic ability but knowing how to structure the design so it prints clearly and withstands outdoor conditions.
Tools in this category typically offer drag-and-drop editing, preset pillow dimensions, and integrated print fulfillment. Platforms like Adobe Express make it possible to start from a structured template rather than a blank canvas, reducing layout decisions and speeding up the process. If you want to explore a streamlined workflow, you can check out this pillow designer from Adobe Express and review the available layout presets before committing to a direction.
The steps below walk through a practical, decision-focused workflow designed to help you complete a polished design quickly and confidently.
Step-by-Step How-To Guide for Using Custom Outdoor Pillow Design
Step 1: Select the Pillow Format and Template
Goal
Choose a pillow size and template structure that simplifies layout decisions from the start.
How to do it
- Decide on shape (square, lumbar) based on the recipient’s seating style.
- Confirm dimensions before editing to avoid resizing later.
- Filter templates by tone (modern, botanical, minimal, typographic).
- Choose a layout that already resembles your intended final look.
- Confirm whether the design applies to one or both sides.
What to watch for
- Template aspect ratio must match the pillow size exactly.
- Some layouts are designed for indoor fabric only—verify outdoor suitability.
- Avoid heavily layered templates if you need a fast turnaround.
Tool notes
For tracking production timelines and design tasks—especially if ordering multiple gifts—a project management platform like Trello (Project Management) can help organize deadlines without affecting the design workflow.
Step 2: Define the Core Message or Image
Goal
Clarify the single idea the pillow should communicate before adjusting visual details.
How to do it
- Decide on one central element: family name, move-in year, coordinates, or short phrase.
- If using a photo, confirm it is high resolution (ideally 300 DPI at final print size).
- Keep text concise—one short sentence or two lines maximum.
- Match tone to recipient (neutral, playful, seasonal).
- Write out the exact wording before placing it into the editor.
What to watch for
- Long quotes reduce font size and legibility.
- Outdoor lighting can wash out low-contrast color combinations.
- Images pulled from social media may be too low resolution for print.
Tool notes
If you need to lightly refine an image before uploading—such as adjusting brightness or cropping—tools like Pixlr (Photo Editing) can help prepare the file without requiring advanced editing skills.
Step 3: Refine Typography and Alignment
Goal
Ensure the design remains readable from a distance and visually balanced.
How to do it
- Center key text unless using a deliberate asymmetrical design.
- Increase line spacing slightly for outdoor readability.
- Use bold or semi-bold weights for important words.
- Maintain consistent margin spacing around edges.
- Preview at full scale to approximate printed appearance.
What to watch for
- Script fonts may lose clarity on textured fabric.
- Text placed too close to edges risks trimming.
- Mixing too many fonts creates visual clutter.
Tool notes
If experimenting with complementary color palettes, a tool like Coolors (Color Palette Generator) can help identify high-contrast combinations that remain legible in sunlight.
Step 4: Optimize for Outdoor Conditions
Goal
Choose colors and materials that perform well in sunlight and weather.
How to do it
- Select UV-resistant or weather-resistant fabric options.
- Choose high-contrast color combinations for readability.
- Avoid extremely subtle gradients that may fade visually outdoors.
- Check washing instructions and fabric durability.
- Confirm insert type and closure style.
What to watch for
- Bright neon tones may appear oversaturated in sunlight.
- Some outdoor fabrics are water-resistant but not waterproof.
- Dark backgrounds may show pollen or dust more easily.
Tool notes
If comparing shipping windows or delivery estimates for different providers, using a task tracker like ClickUp (Project Management) can help keep timelines organized.
Step 5: Prepare the File for Print
Goal
Ensure the final design exports correctly and prints without cropping or resolution issues.
How to do it
- Confirm export resolution (300 DPI recommended).
- Keep critical elements inside safe margins.
- Extend background colors or patterns fully to bleed edges if required.
- Review final preview at actual size.
- Double-check spelling, names, and dates.
What to watch for
- Low-resolution images can appear pixelated when enlarged.
- Text placed within bleed areas may be cut off.
- Color shifts may occur between screen and fabric.
Tool notes
If exporting manually for a local print vendor, organizing file versions in a cloud storage tool like Dropbox (File Management) can prevent accidental submission of outdated drafts.
Step 6: Final Review and Order
Goal
Confirm accuracy and durability before placing the final order.
How to do it
- Review both front and back designs if double-sided.
- Confirm quantity and insert inclusion.
- Recheck shipping address and delivery date.
- Save a digital proof copy for reference.
- Submit the order once all details are verified.
What to watch for
- Misspelled names are one of the most common errors in personalized gifts.
- Confirm whether inserts are included or sold separately.
- Factor in production time in addition to shipping.
Tool notes
If coordinating gift delivery with other household items, organizing your checklist in Notion (Project and Note Management) can help consolidate confirmations and tracking details.
Common Workflow Variations
Photo-Based Keepsake
Use a minimal frame layout and keep text secondary to the image. Ensure high-resolution files to avoid blur.
Coordinate or Address Design
Feature geographic coordinates or the street name in a clean typographic format for a subtle personalization approach.
Pattern-Forward Accent
Choose a repeating outdoor-friendly pattern and add a small personalized line for balance.
Two-Sided Configuration
Place a decorative pattern on one side and a personalized message on the other, confirming double-sided print compatibility.
Checklists
Before You Start Checklist
- ☐ Confirm recipient’s outdoor décor style
- ☐ Select pillow size and shape
- ☐ Prepare finalized wording
- ☐ Verify high-resolution images
- ☐ Decide on single- or double-sided print
- ☐ Confirm outdoor fabric availability
- ☐ Check delivery timeline
- ☐ Review return or reprint policies
Pre-Export / Pre-Order Checklist
- ☐ Resolution at 300 DPI
- ☐ Text within safe margins
- ☐ Background extended to bleed edges
- ☐ Spelling and dates verified
- ☐ Color contrast sufficient for outdoor light
- ☐ Fabric and insert selection confirmed
- ☐ Shipping details reviewed
Common Issues and Fixes
Low-Resolution Image
Replace with a higher-resolution file or reduce image scale within the layout.
Text Too Close to Edge
Move elements inward to respect safe-area guides.
Color Shift in Print
Adjust brightness slightly and avoid extremely subtle tones.
Cropping Misalignment
Preview using trim simulation before final export.
Overcrowded Layout
Remove secondary decorative elements and emphasize one central idea.
How To Use Custom Outdoor Pillow Design: FAQs
Is it faster to start with a template or a blank canvas?
Templates reduce layout complexity and improve speed. Blank canvases provide flexibility but require more spacing decisions.
Should the product be chosen before designing?
Yes. Selecting dimensions first prevents resizing complications later.
Is integrated print fulfillment better than exporting manually?
Integrated fulfillment reduces formatting errors and simplifies ordering. Manual export is useful if using a local vendor.
How can the gift feel meaningful without heavy design work?
Subtle personalization—such as coordinates or move-in year—adds significance without complicating layout.
Also Read
- Unlocking Youthful Skin: The Wonders of Microneedling Pen Technology
- The Science of Sole: How Footwear Affects Your Health
- Driving Made Simple: Flexible Car Rental Options for Every Lifestyle