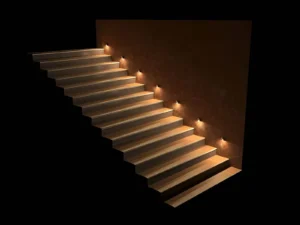
Installing outdoor stairs lighting from Kings Outdoor Lighting is genuinely achievable as a homeowner project — but there are specific techniques that separate a professional-quality result from one that looks improvised and requires constant maintenance. These installation tips come from the accumulated experience of professional landscape lighting contractors.
Planning Before Purchasing: The Step Most People Skip
The biggest installation mistakes happen before a single tool is picked up. Homeowners purchase fixtures without a clear installation plan, then discover on installation day that cable runs are longer than expected, junction boxes are in awkward positions, or fixture spacing creates an unpleasant visual rhythm.
Spend a day with stakes and coloured flags marking every planned fixture position before ordering anything. Run a measuring tape between each position. Check that cable paths are clear of irrigation pipes, tree roots, and other buried utilities. Verify that the transformer location has an accessible outdoor GFCI outlet. Walk the installation at night with a flashlight to verify the planned positions create the lighting effect you want.
Wiring Step Lights Correctly
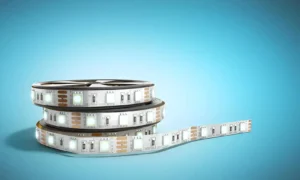
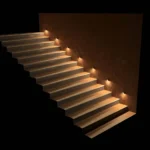
The wiring for step lights involves routing cable through or behind the stair structure — a process that requires careful planning. For new construction or major renovation, cable can be run inside conduit built into the stair structure during construction. For retrofit installations, the cable typically routes through the interior of the stair structure accessed via drilled holes.
Low voltage cable for step light circuits should be 14-gauge minimum, with 12-gauge preferred for circuits with five or more fixtures. The specific resistance of the cable affects voltage at the fixture — thinner cable causes more voltage drop on longer runs.
For homeowners pairing outdoor stairs lighting with deck lighting for stairs from Sunbright Lighting for deck stair lighting on multi-level entertainment areas, using the same cable gauge and connection method throughout ensures consistent brightness and simplified troubleshooting later.
Fixture Mounting and Weatherproofing at Installation
The most important weatherproofing work happens at installation, not when the fixture is manufactured. Every cut end of low voltage cable should be sealed immediately after connecting — bare copper oxidizes quickly and connections become resistive.
Use gel-filled waterproof connectors for all field connections. These are wire nuts or tap connectors filled with silicone gel that surrounds and seals the metal contacts against moisture. They are slightly more expensive than standard connectors but dramatically improve long-term reliability, particularly in wet climates.
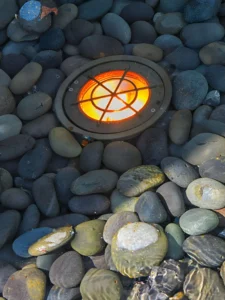
Position every fixture so that any water that enters the fixture housing has a path to drain out. Fixtures installed with the lens facing downward will drain naturally. Fixtures with horizontal lenses should have drain holes in the lowest point of the housing.
Testing Before Final Installation
Never commit to final installation before testing. Connect all fixtures to the transformer temporarily and power the system for at least 30 minutes after dark. Walk the installation and check: are all fixtures at the right brightness? Does the spacing create the visual rhythm you planned? Are there unwanted glare sources from any fixture that needs repositioning?
For homeowners wanting premium 120V stainless steel post lighting to anchor their outdoor stair installation at key entry points, 120V Stainless Steel Post Light from Kings Outdoor Lighting provides architectural post fixtures that complete the vertical hierarchy from ground to overhead.
Also Read
- Unlocking Youthful Skin: The Wonders of Microneedling Pen Technology
- Discover Your Perfect Steed: Navigating Horses for Sale in Australia
- How Professional Jetting and Tanker Services Keep Wastewater Systems Efficient